Title here
Summary here
Ourchive leverages integration testing to test end-to-end flows for activities such as searching or loading a user’s works. We have a separate Cypress repo to accomplish this goal, as well as settings that allow you to run the app against a database specifically for integration testing.
Integration tests should use ourchive_app.settings.integration, which uses a different database and includes information on test data for the app.
Create a database, e.g. ourchive_db_integration, on the same database server with the same user as your local dev environment. Set the appropriate value in your .env file:
OURCHIVE_INTEGRATION_DB_NAME=ourchive_db_integrationThen, in the terminal, activate your venv, cd to ourchive/ourchive_app, and run the data population script:
./generate-test-data.shThis script does three things:
ourchive_app.settings.integrationloadourchivedata management command to load necessary data (settings and notification types)createintegrationtestdata management command to load test data for integration testing.createintegrationtestdata uses Faker to generate fake data to populate a site. This includes:
This is done leveraging ourchive_app.util.ourchive_fakes. The ourchive_app module’s tests.py has a test suite for these functions, which you can run to observe their behavior. Note that under test, generate_everything is flaky - so the test is skipped, but you can run it to debug if need be. (The flakiness is largely a function of duplicate data concerns that are handled when the script is run by the management console.)
Once you’ve run the bash script, you should be able to start the site:
python manage.py runserver --settings=ourchive_app.settings.integrationAnd view the generated data.
Note
You can generate more data by running the createintegrationtestdata command yourself:
python manage.py createintegrationtestdata -s y --settings=ourchive_app.settings.integrationThe -s flag tells the command to skip creating unique data like users and tag types, but will create more chives, admin info, etc. This can be useful if you’re testing something like search pagination. Use
python manage.py createintegrationtestdata --helpfor more information on this command.
To ensure Cypress works on your machine prior to installing our tests, please follow their guide. We test using their npm instructions.
In your projects directory, clone the repo.
git clone https://github.com/OurchiveIO/ourchive-e2e-testsNavigate to the directory and install requirements.
cd ourchive-e2e-tests
npm install
Note
Current config assumes you’re using the default Django runserver URL, http://127.0.0.1:8000/. If you’re not, just update cypress.config.js with your URL.
In your root ourchive-e2e-tests directory, copy the environment variables:
cp cypress.env.EXAMPLE.json cypress.env.jsonOpen cypress.env.json and update the variables if you want.
searchTerm: Used for search smoke testing, the term that is typed in the search box. Default is a word we are sure Faker will seed for us: “the”.
facetFilter: The checkbox filter used to test faceted filtering. Default is one of our generated data’s work types: “Fic”.
smokeTestUser: A user who has collections, series, and anthologies - IOW, a user with a rich set of chives. Since data is generated randomly this keeps tests from failing. Will eventually be replaced by navigation when series and anthologies are included in search results.
Run Cypress:
npm run cy:openYou should see Cypress open up. Click ‘E2E Testing’ - you will likely see an error:
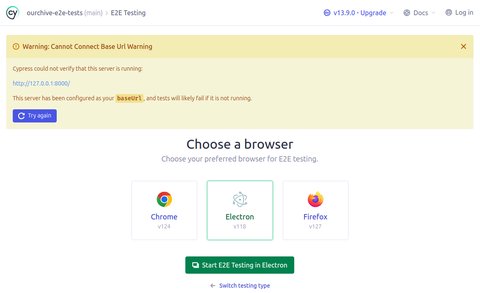
python manage.py runserver --settings=ourchive_app.settings.integrationYou should now be able to run the integration tests.
We welcome contributions to the E2E repo. As of 2024, we are targeting smoke testing and form functionality (CRUD operations on chives, users, etc).